
Dear Niki,
Remember how I printed the leaves on my bandage-looking scarf ? Well like I said, while the paint was drying, I looked around for ideas of what I could turn the scarf into. As luck would have it, I actually found a tutorial to make a kimono!!!
I was so excited when I saw this tutorial from BonsaiHewes on Pinterest and I couldn’t wait to try it out. It is very simple and only requires a little cutting and sewing.
There aren’t too many steps and each is well-explained, so you shouldn’t run into any problems (especially if you follow the tutorial). It seemed so simple and I was so excited to get started that I didn’t take my phone with me to recheck the steps. I decided it would be nice to do most of the sewing in one go and stitched up the shoulder seams before cutting the sleeve openings. But all was not lost! I was scared to snip a little hole in the fold and then cut towards to the top to make the sleeve opening, but I tried to be gentle and careful and it worked out alright. Lesson: take your tutorial with you so you can review the steps along the way!
Hemming the sleeves before sewing the shoulders together is easier since you won’t have to worry about pressing open the seams to make sure they lie flat and don’t cause any unnecessary bulk. If this seems confusing, don’t worry about it! These problems won’t factor in as long as you follow BonsaiHewes’ sequence of steps 🙂
A nice thing about folding the scarf this way is that the selvage is at the shoulders and bottom of your finished product so you don’t have to hem or worry about fraying here. Depending on the fabric of your scarf, you may have some fraying where you cut along the sleeves and neckline so a serger, zigzag stitch or twice-folded hem will be necessary at these areas.
I struggled a bit with my fabric. I may have to stick to cotton for these sewing projects. My scarf is a viscose fabric so it’s nice and soft as a scarf (and now a kimono), but it was wriggly when I tried to line up the edges to fold and cut. The nice thing is, this draping, flowy style is fairly forgiving and will cover up some uneven cutting etc.
Check out the finished product!
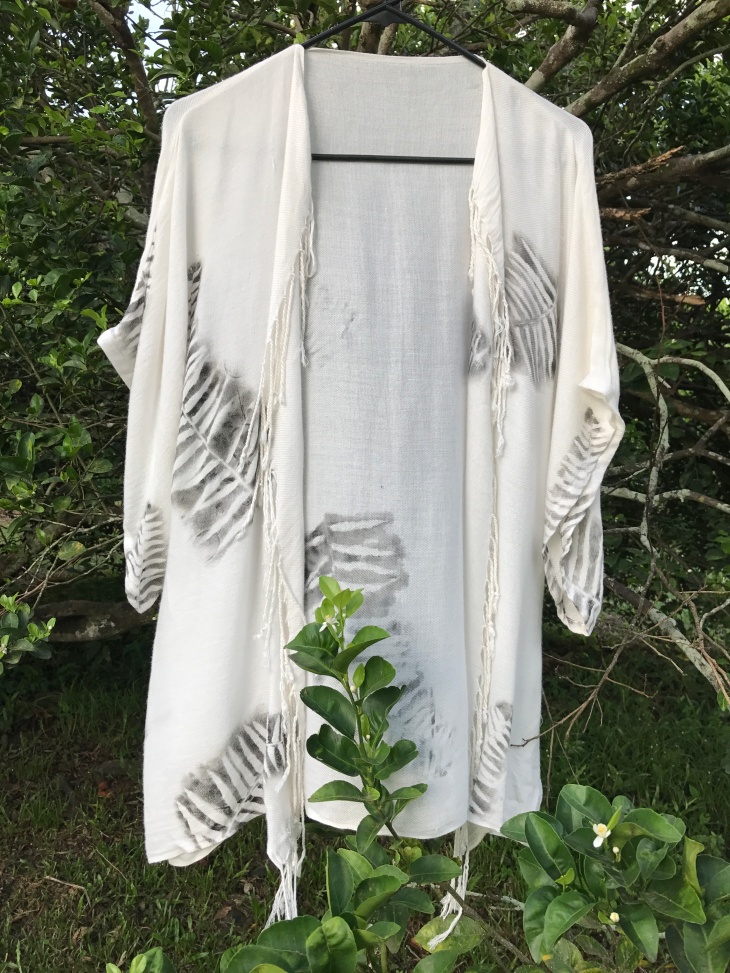
I find it’s a little too boxy and loose on me, but I expected this method to give a more boxy finish and I probably should have made the sleeves and body a bit smaller (I didn’t follow the tutorial here either *sheepish grin*).
Ultimately, I have a new piece of clothing to wear, having spent $0 and I think this will look really nice with slim-fitting clothes and heels, as a beach coverup or even with high-waisted shorts. It’s also very cosy and could go over comfy shorts or pajamas to snuggle up with a good book or TV series.

Have any unused scarves you want to turn into a kimono-style cardigan?
À bientôt!


Thank you for the sensible critique. Me and my neighbor were just preparing to do a little research on this. We got a grab a book from our local library but I think I learned more from this post. I am very glad to see such fantastic info being shared freely out there.
LikeLiked by 1 person
Thank you so much! I’m so happy you found this post useful. Good luck to you and your neighbour! I’d love to see how your projects turn out 🙂
LikeLike
What a cute kimono!! I love a good DIY and this one is too fun!
LikeLike
Glad you enjoyed it!
LikeLike
What a cool project! I love the way your kimono turned out. Beautiful & organic. :]
LikeLike
Thank you!
LikeLike
I love how this turned out!
LikeLiked by 1 person
cool project, amazing. Thank you for sharing all the great info.
LikeLike
Thank you! And thanks for stopping by 🙂
LikeLike